


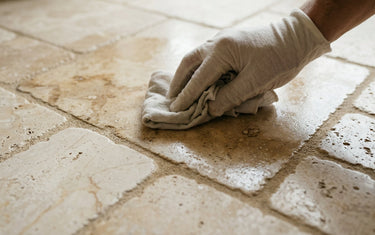
Marble tile is soft, porous calcium carbonate, so what you do between delivery and the first week of use decides how it ages. Acids dissolve it, oils and grout pigment soak into it, and grit scratches it. Sealing helps with only some of that, and the finish you chose (polished, honed or tumbled) changes what matters most.
When your tile arrives
Open and check every box before installation starts, not halfway through the job.
- Check the count and condition. Look for chips, cracks and broken pieces, and confirm you have your square footage plus about 10% for cuts.
- Check the lot. Natural stone varies from lot to lot. Make sure every box matches, or reserve one lot for the whole project with our Same-Lot Reserve.
- Dry-lay and blend. Lay tiles out and pull from several boxes at once, so color and veining spread evenly instead of clustering in one corner.
- Store tiles flat and dry until they go on the wall or floor.

During installation: the steps that prevent most problems
Most marble tile complaints, like grout-stained edges, dark patches and scratched polish, start during installation. Share this list with your installer, or find a natural-stone contractor.
- Use white thinset for white and light marble. Gray thinset can show through translucent stones like Thassos, Carrara and Calacatta.
- Pre-seal before grouting. A coat of impregnating sealer on the tile face and edges keeps grout pigment from staining the stone. This matters most with a contrasting grout color and with tumbled tile, whose pits and rough edges grab grout.
- Choose grout to match the finish. On polished marble with tight joints, unsanded grout is the usual choice, because sanded grout can scratch the surface during cleanup. Ask your installer which grout suits your joint width.
- Clean grout haze promptly with water and a soft sponge, never an acidic haze remover.
- Let everything cure (typically about 72 hours, per the grout manufacturer) before the final seal.
Our installation guide covers the full process.
Sealing: useful, but limited
Seal marble tile in kitchens, bathrooms and on floors, but know that a sealer slows stains and does nothing against etching. An impregnating (penetrating) sealer sits inside the pores and buys you time to wipe up oil, wine, coffee or shampoo. Lemon juice will still leave a dull mark on sealed marble.
Test first. Put a few drops of water on several tiles and grout lines and wait 10–15 minutes. If the stone or grout darkens, it's absorbing and needs sealing.
How to apply the final seal:
- Make sure grout has cured and the surface is clean and fully dry.
- Use an impregnating sealer labelled for natural stone. Avoid topical coatings and waxes on floors and backsplashes; they scratch, peel and turn hazy.
- Apply evenly over tile and grout lines with a lint-free cloth, applicator pad or small brush.
- Let it dwell for the time on the label, then wipe off all excess before it dries. Residue left on the surface causes streaks and haze.
- Add a second coat if the label calls for it, and let it cure (often 24–72 hours) before showers, mopping or heavy cooking.
How often: don't seal on a calendar. Repeat the water test every 6–12 months in showers and on busy floors, less often on backsplashes, and reseal when water darkens the stone or grout.
Care by finish
The finish changes how damage shows and how much sealing the tile needs.
| Finish | What to expect | Care tips |
|---|---|---|
| Polished | Glossy and least absorbent, but etch marks show clearly as dull spots. Can be slippery when wet. | Best for backsplashes and walls. Wipe acids immediately. On floors, use mats near sinks and showers. |
| Honed | Smooth matte surface that hides etching and scratches well. More absorbent than polished. | A strong choice for floors and bathrooms. Keep up with sealing, since stains soak in more easily. |
| Tumbled | Rustic, softened edges and a textured, pitted surface that hides wear best of all. The most absorbent. | Pre-seal before grouting and seal well afterward. Use a soft brush for cleaning so dirt doesn't settle in the texture. |
Daily care
- Clean with a pH-neutral stone cleaner or warm water with a drop of mild dish soap. Dry polished tile with a soft cloth to avoid water spots.
- Never use vinegar, lemon, bleach, ammonia, "all-purpose" sprays, bathroom descalers, tub-and-tile cleaners, or abrasive powders and pads. They etch the marble and break down grout and sealer.
- Kitchen backsplash: wipe splashes of tomato, citrus, wine and oil right away, especially behind the stove and sink.
- Showers: squeegee after use to cut down on soap scum and hard-water buildup, and keep shampoo and soap bottles off the tile on a shelf or caddy.
- Floors: dust-mop or vacuum often (soft head, no beater bar) and put doormats at entrances. Tracked-in grit acts like sandpaper. Add felt pads to furniture legs.
Etch or stain? Different problems, different fixes
An etch is damage to the surface; a stain is something absorbed into it. Tell them apart before treating anything.
| Etch | Stain | |
|---|---|---|
| Looks like | Dull, lighter, rough or cloudy spot | Darker (or colored) spot, surface texture unchanged |
| Cause | Acid dissolving the stone | Oil, coffee, wine, rust, hair dye or grout pigment soaking in |
| Does sealing prevent it? | No | Slows it down |
| Fix | Marble polishing powder or etch remover for light marks on polished tile; professional honing for deep ones | Poultice matched to the stain (e.g. baking soda and water for oil, hydrogen peroxide for organic stains on light stone), left 24–48 hours |
Test any product on a spare tile or hidden spot first. Keep a few leftover tiles from your order: a cracked or badly damaged tile can be swapped out, which is one big advantage tile has over a slab.
Long-term maintenance
Expect a stone professional to refresh busy floors and showers every few years by cleaning grout, honing or re-polishing worn areas, and resealing. Backsplashes rarely need more than periodic resealing. Many owners also let marble develop a soft patina over time and treat that as part of its character.
Myths, and a checklist
- "Sealed marble is protected." Only from stains, and only for a while. Acids still etch it.
- "Seal it every year." Seal when the water test says so, not by date.
- "Vinegar is a natural cleaner." On marble and grout, it's an etching agent.
Your marble tile checklist:
☐ Check every box for damage, count and matching lot on delivery
☐ Dry-lay and blend tiles from several boxes
☐ Use white thinset for light marble
☐ Pre-seal before grouting, especially tumbled tile or contrasting grout
☐ Seal tile and grout after the grout cures
☐ Switch to a pH-neutral stone cleaner and remove acidic or abrasive cleaners
☐ Keep a few spare tiles for future repairs
☐ Set a reminder to water-test in 6 months
Still choosing your stone? Order any 5 samples for $25 and test them at home first. Drip a little lemon juice and olive oil on a sample to see how each finish handles real life.
